
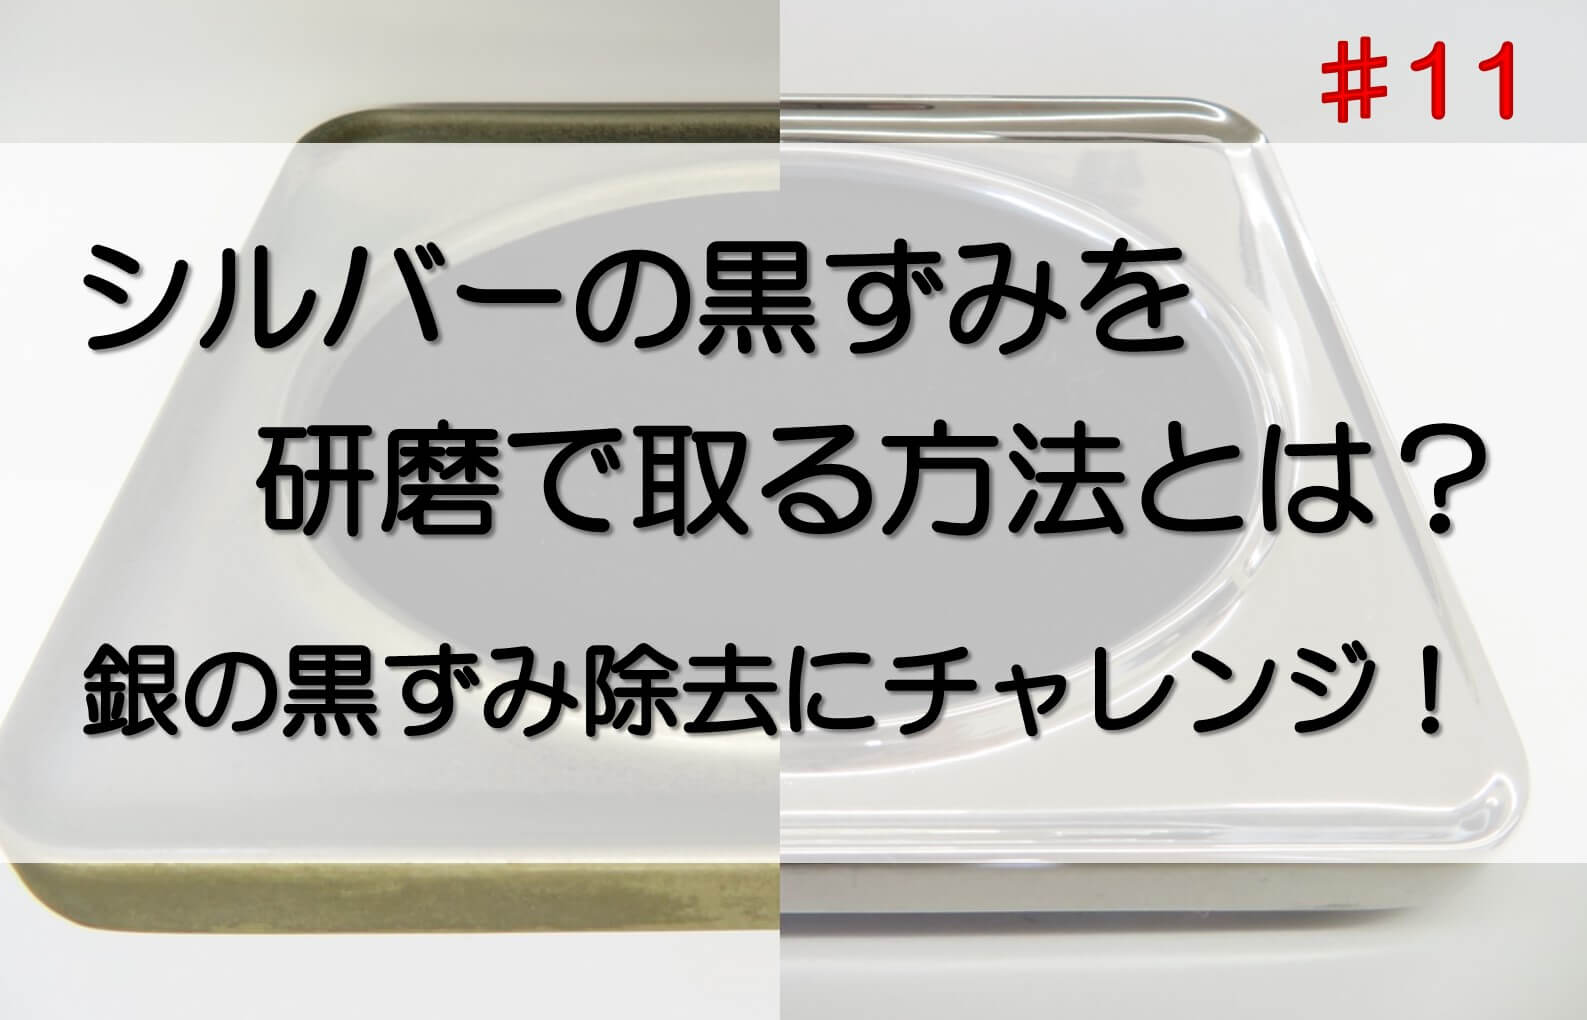
How to remove silver tarnish by polishing? Let's try to remove silver tarnish by using abrasives!
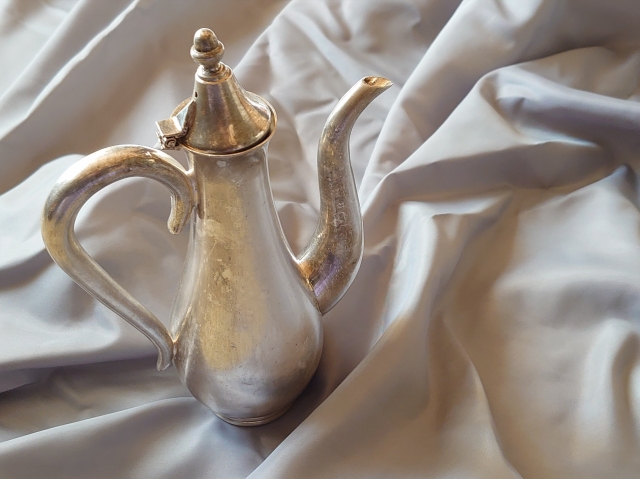
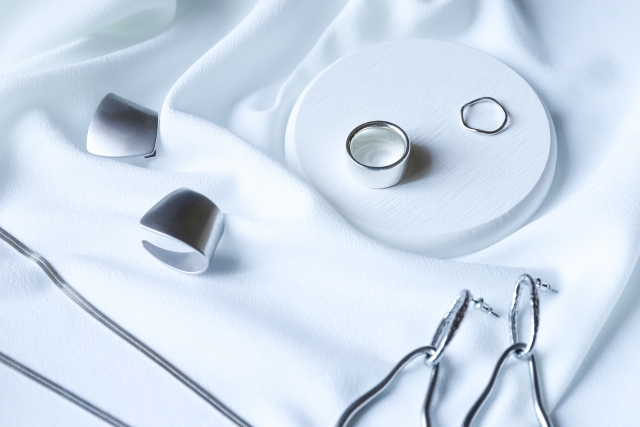
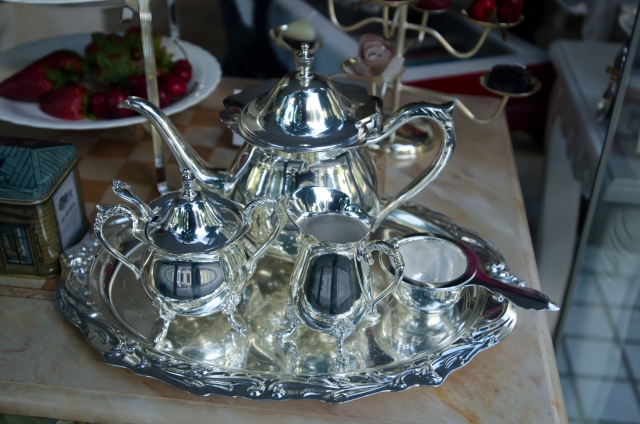
If you have silver jewelry or other small silver items, you have probably suffered from dark spots at least once.
The luster of silver is one of its charms. Silver accessories have an image of being very troublesome, as they quickly darken if they are not cared for even a little.
What in the world is that blackness? Rust? Or is it dirt?
If you are wondering what kind of care is best for silverware that has darkened, this is a must-see!
In this issue, we will introduce the mechanism of blackening and how to remove blackening, which you should know in order to restore the beautiful shine of silver.
Table of Contents
1. What exactly are dark spots that occur on silver? Can it be removed by polishing? Is it true that gold and silver do not rust?
2. Can I remove tarnish from silver by polishing? What is the best way to care for tarnished silver jewelry?
3. I actually polished a silver photo frame that was blackened! How to properly care for your silverware!
4. It is important to take care of your silverware after cleaning! You've gone to the trouble of polishing and removing tarnish from your silver, so let's maintain that shine!
5. Enjoy the luster of silver by reviewing the care and management of silver!
1. What exactly are dark spots that occur on silver? Can it be removed by polishing? Is it true that gold and silver do not rust?
Blackening is the great enemy of silver jewelry.
It is common to hear that the silver has lost its luster, even though it was not stored in particularly poor conditions.
In fact, there was a reason why these dark spots were so difficult to prevent even with care.
Let's start by exploring the causes of blackheads.
As the name suggests, many people mistake this blackening for rust because it is black, but it is not rust.
To begin with, gold and silver are extremely rust-resistant compared to iron and copper.
It does not oxidize easily except under special circumstances, for example, heating to a very high temperature.
The cause of this darkening is related to sulfidation and chloride.
Let's look at them in order.
・・Sulfidation
Sulfidation
The chemical reaction between sulfur and silver (sulfidation) forms a silver sulfide film.
This silver sulfide is the cause of the darkening.
For example, have you ever had the experience of wearing silver jewelry in a natural hot spring, only to have the jewelry turn black?
This phenomenon is exactly what sulfidation is. Hot springs often contain sulfur components, and this sulfur causes a chemical reaction with silver.
Sulfurization doesn't happen in everyday life, as you don't go to a hot spring every day, right?
That is a big mistake! In fact, there are trace amounts of sulfur in the air.
This is why they are stored in drawers (i.e., exposed to air) and darken.
This is the reason why silver jewelry that has been stored in a drawer for a long period of time will darken before long.
・・Chloride
Chloride
Most silver darkening is due to sulfidation, but in rare cases it may be caused by a phenomenon called chlorination.
The formation of a silver chloride film when chlorine comes into contact with silver is called chlorination.
For example, silver jewelry darkens when it comes into contact with chlorine bleach or clothes after dry cleaning.
Trouble is, the two types of blackheads are extremely difficult to distinguish.
Black stains caused by chloride are much more stubborn than those caused by sulfurization, and general black stain removal cleaners are ineffective.
The surface blackening itself must be removed by polishing with an abrasive or polishing cloth.
2. Can I remove tarnish from silver by polishing? What is the best way to care for tarnished silver jewelry?
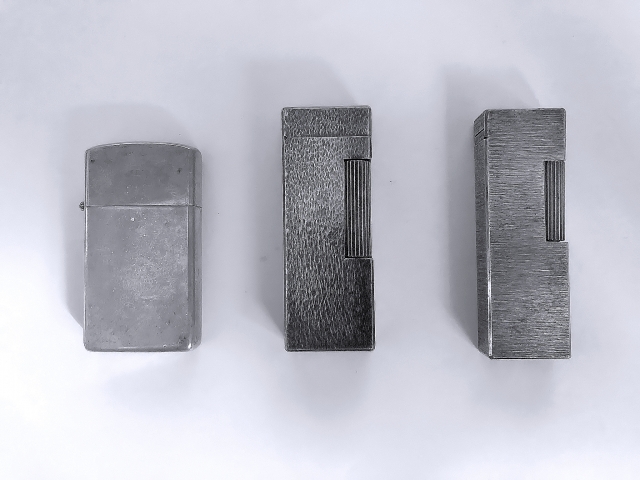
Black stains on small silver items, of course, cannot be removed at all by washing with water or detergent.
If you don't know how to remove silver tarnish and your expensive silver jewelry is in storage, polish and clean it now!
The longer it takes, the more the blackheads will stick. It is important to deal with them as soon as possible.
3. I actually polished a silver photo frame that was blackened! How to properly care for your silverware!
The moment you think of it, it's a good day!
I immediately brought a blackened silver photo frame that had been on my mind for some time.
It is badly darkened, probably because it has been left on display for several years.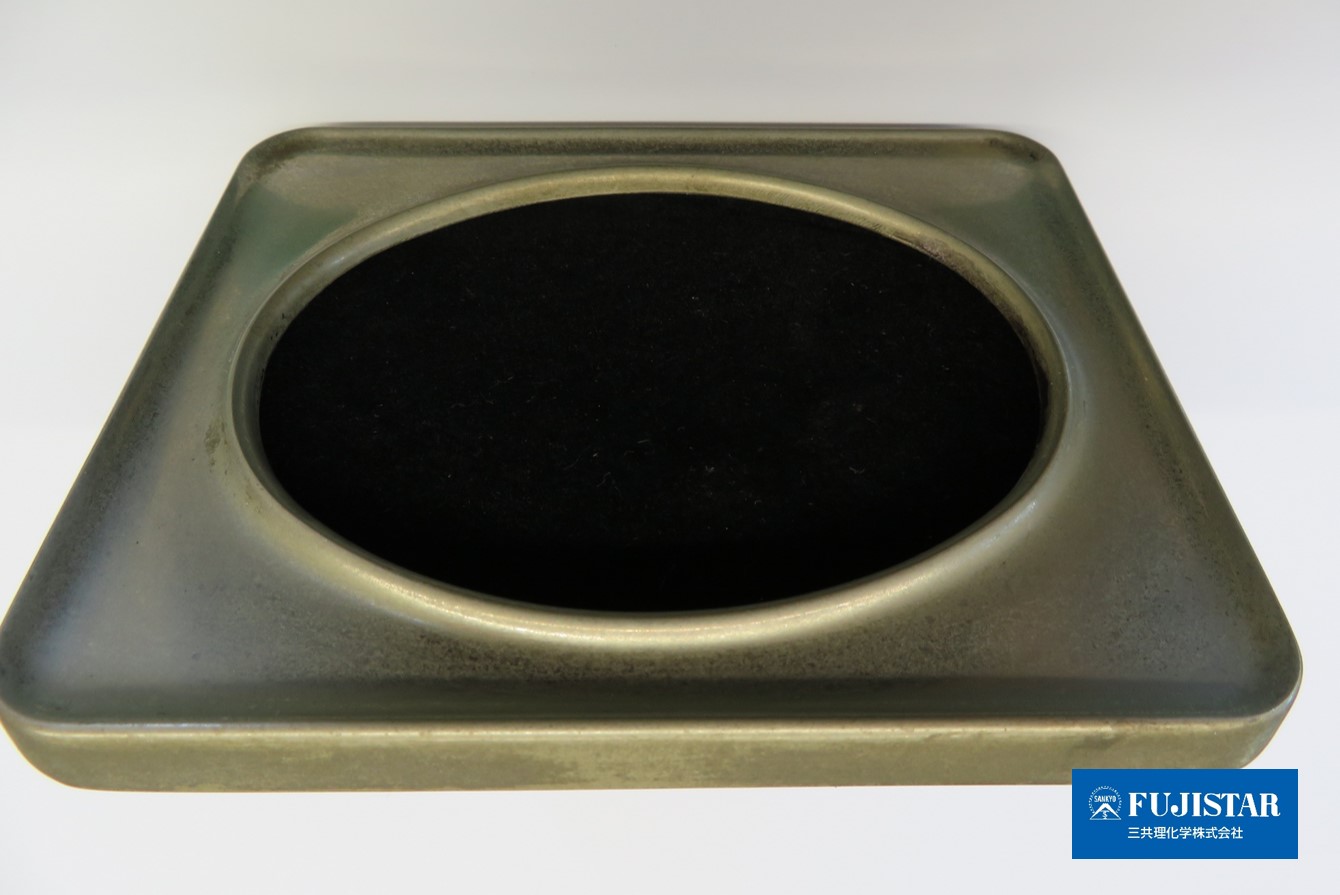
~What to prepare~
・Commercial compound (for finishing)
In this case, <POLI Lab for final finishing> was used.
・Wipe cloth
This time, <Fukkitoru> was used.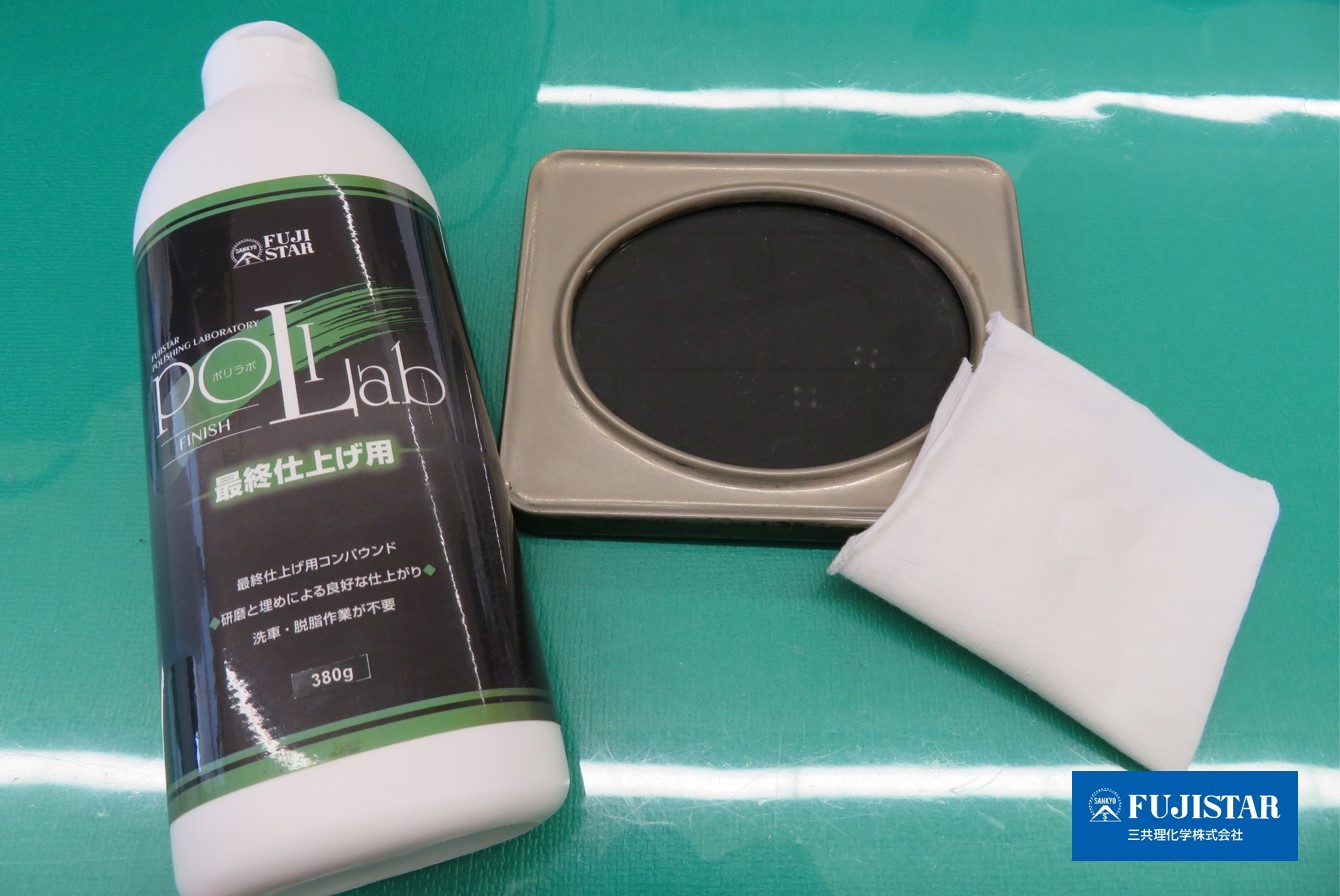
procedure
(1) <Shake POLI Lab For final finishing well, and take a small amount of it on "fukittoru".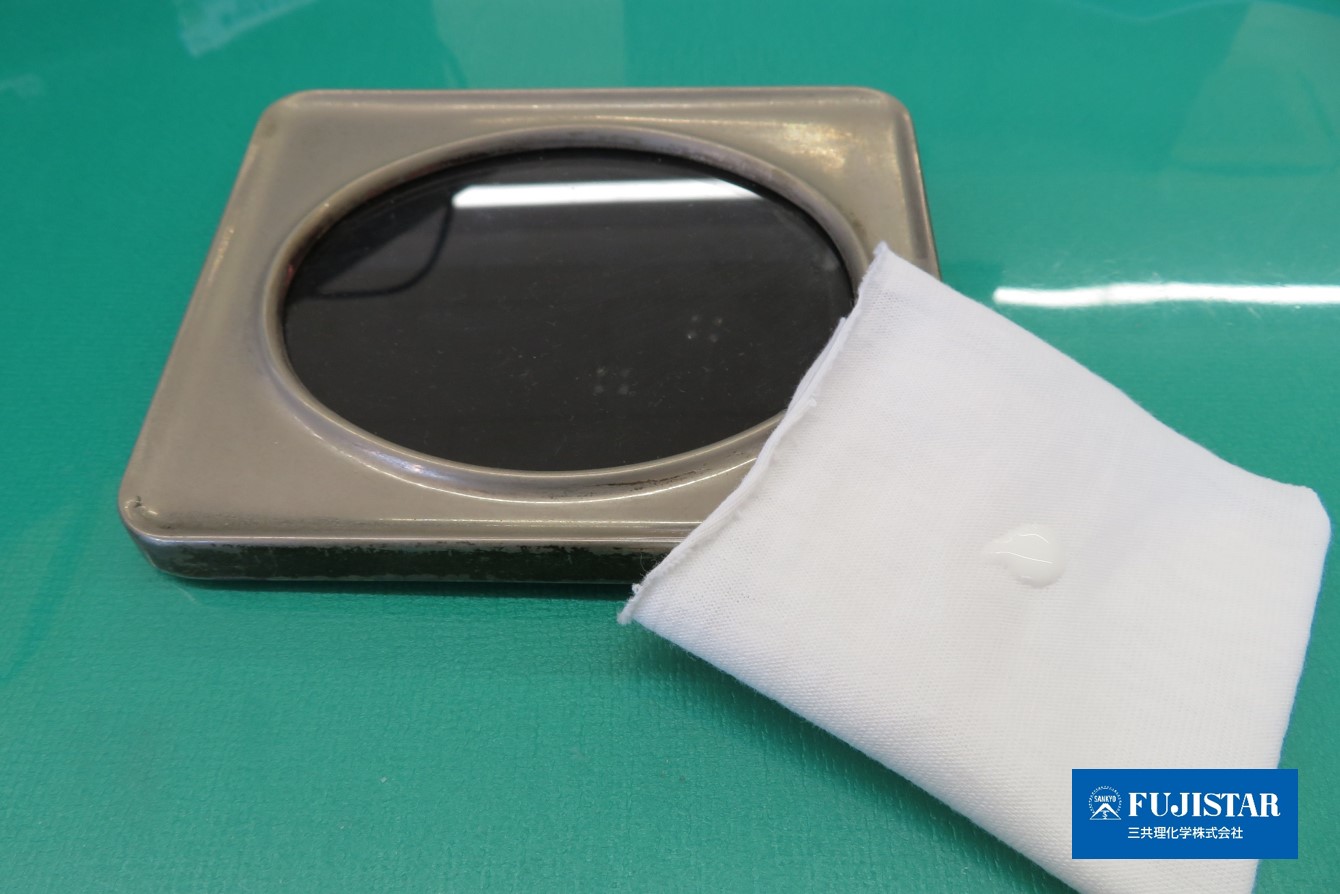
(2) Scrub and polish the surface evenly.
The trick is not to polish a large area at a time, but to divide the polishing into parts and polish little by little!
The compound contains abrasives to scrape off black spots.
Since abrasives are a "scraping" action, they not only remove blackening, but may also scratch the product.
Let's polish it little by little as we see how it goes.
※Do not use this product on products that have been polished or plated. The plating may peel off.
Continued polishing removed the blackened area!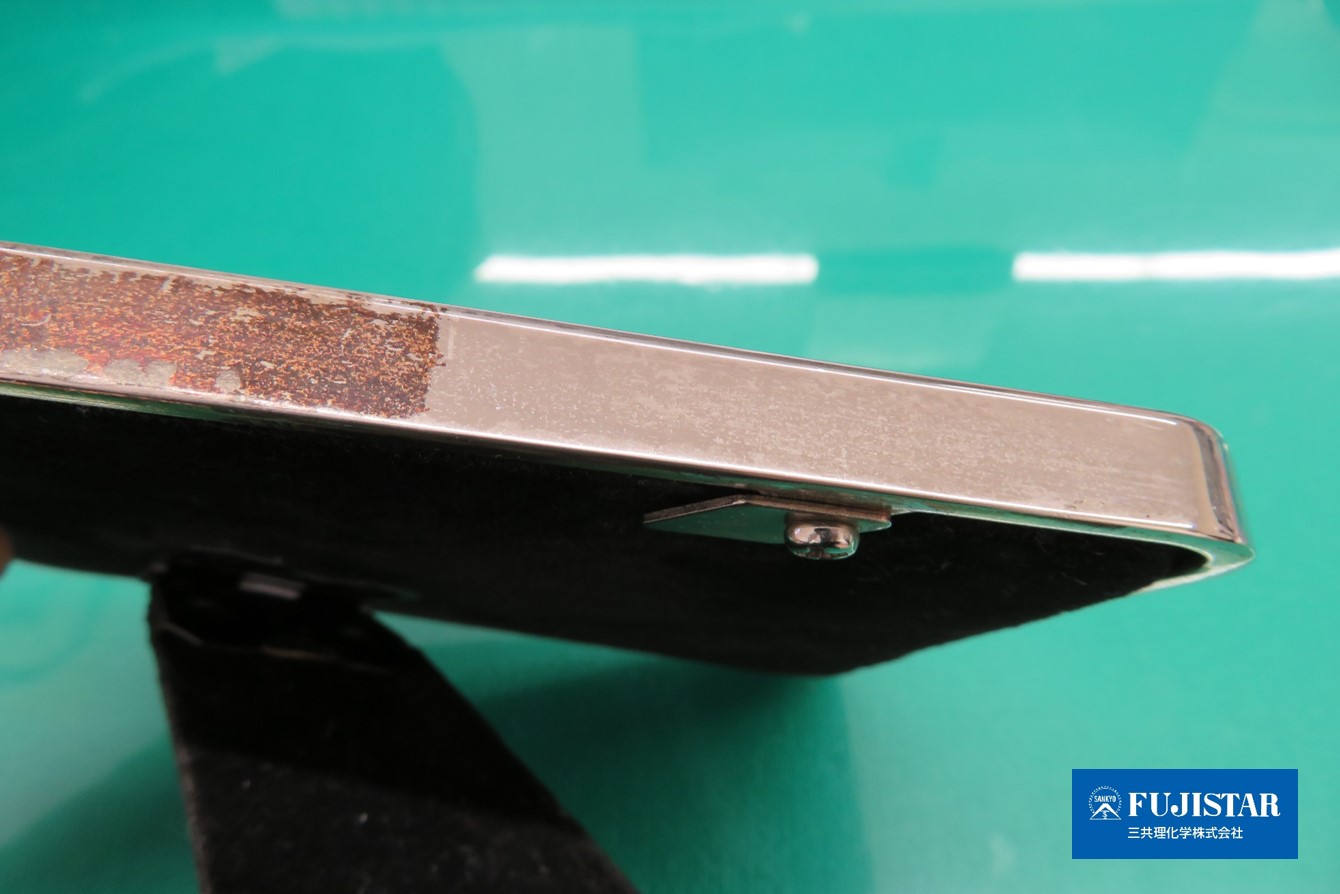
While polishing the silver,
This is not dirt, but polished silver adhering to the surface.
Be careful not to overdo it, thinking that the blackheads are still there.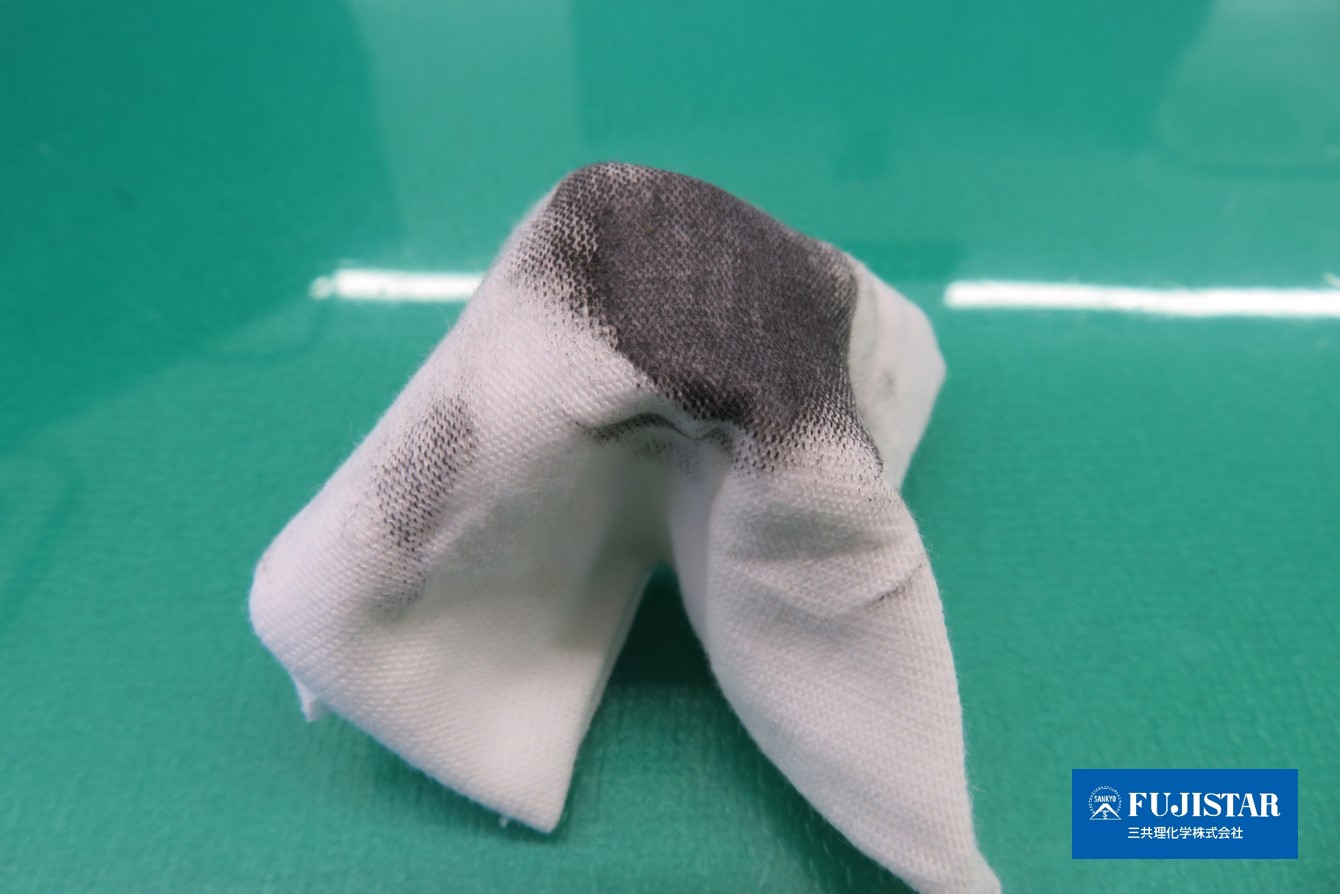
(3) Finally, rinse well with water and wipe dry with a clean cloth.
Now that all the polishing is done, let's take a look at the before and after comparison!
Before polishing
After polishing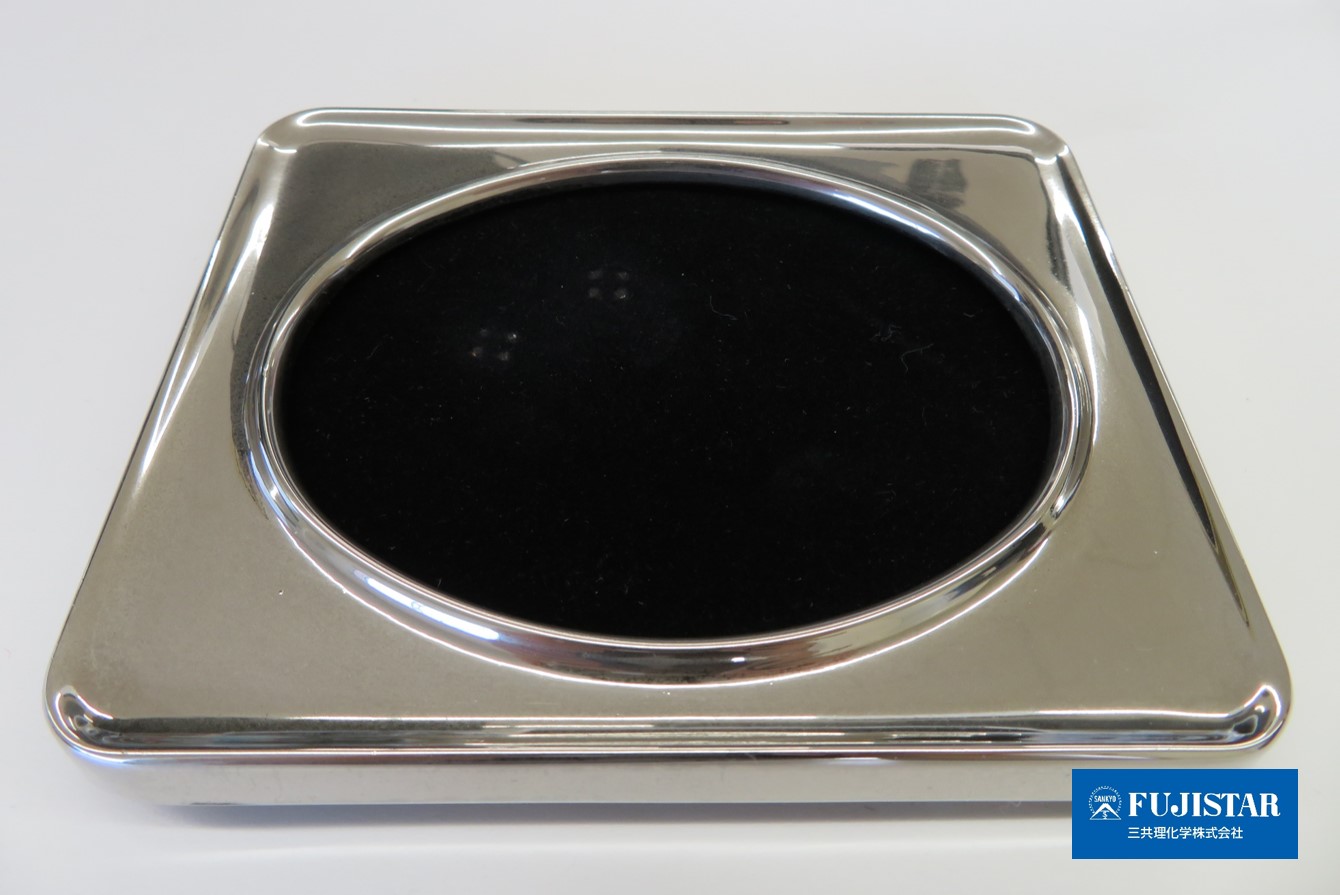
Before polishing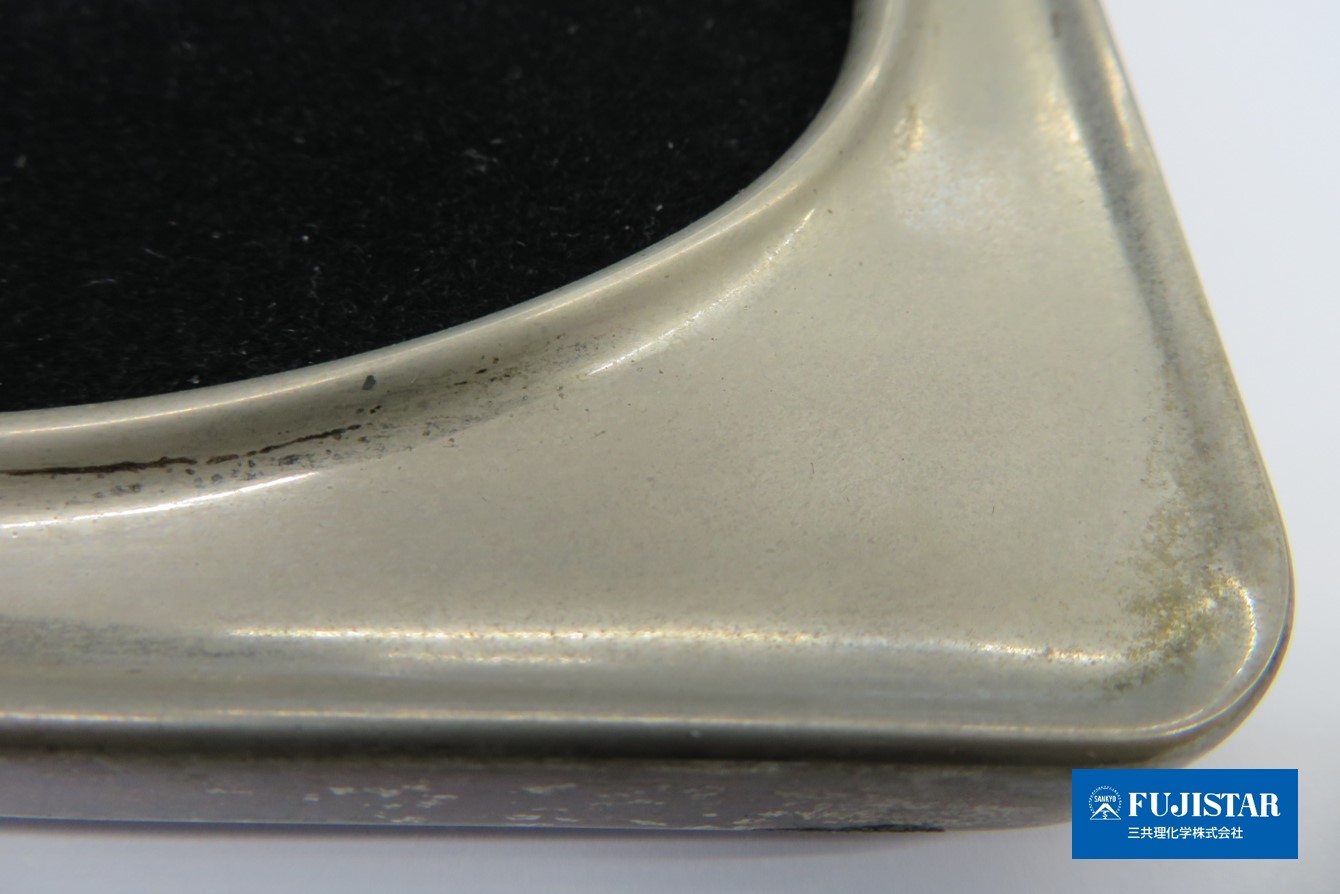
After polishing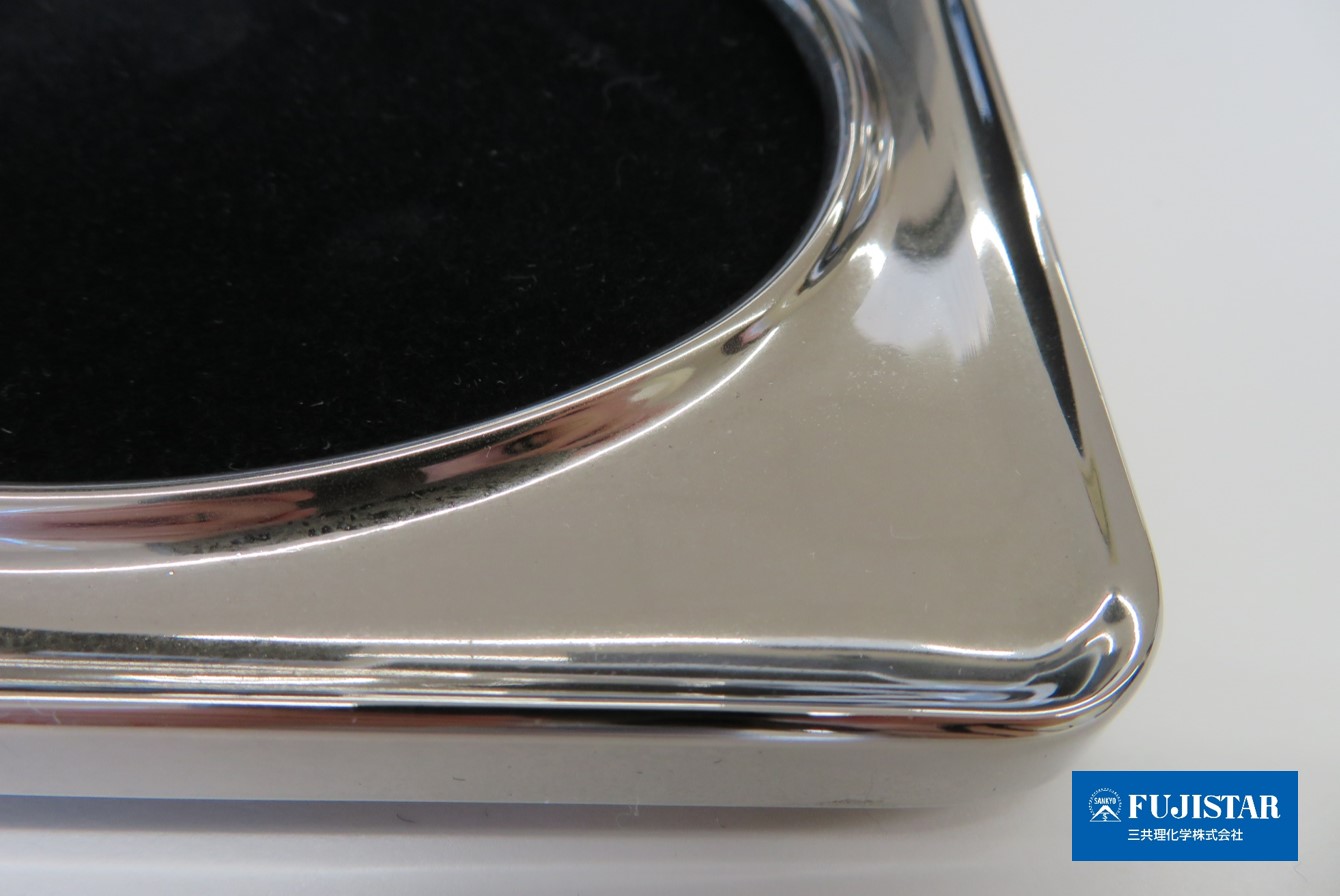
The silver has been completely darkened and the unique silver shine has been restored.
This time it was just a quick polish, but further mirror polishing is also possible!
If you are interested in mirror polishing, please click here.
https://en.fujistar.com/blog/kinzoku-kenma/
Here are the compounds and wiping cloths used in this project.
The finishing touch for polishing is this!
Recommended Product 1: POLI Lab For final finishing(Sankyo Rikagaku Co.)

Click here for product details
Essential for polishing! Easy-to-use pop-up rag
Recommended Product 2:fukittoru(Sankyo Rikagaku Co.)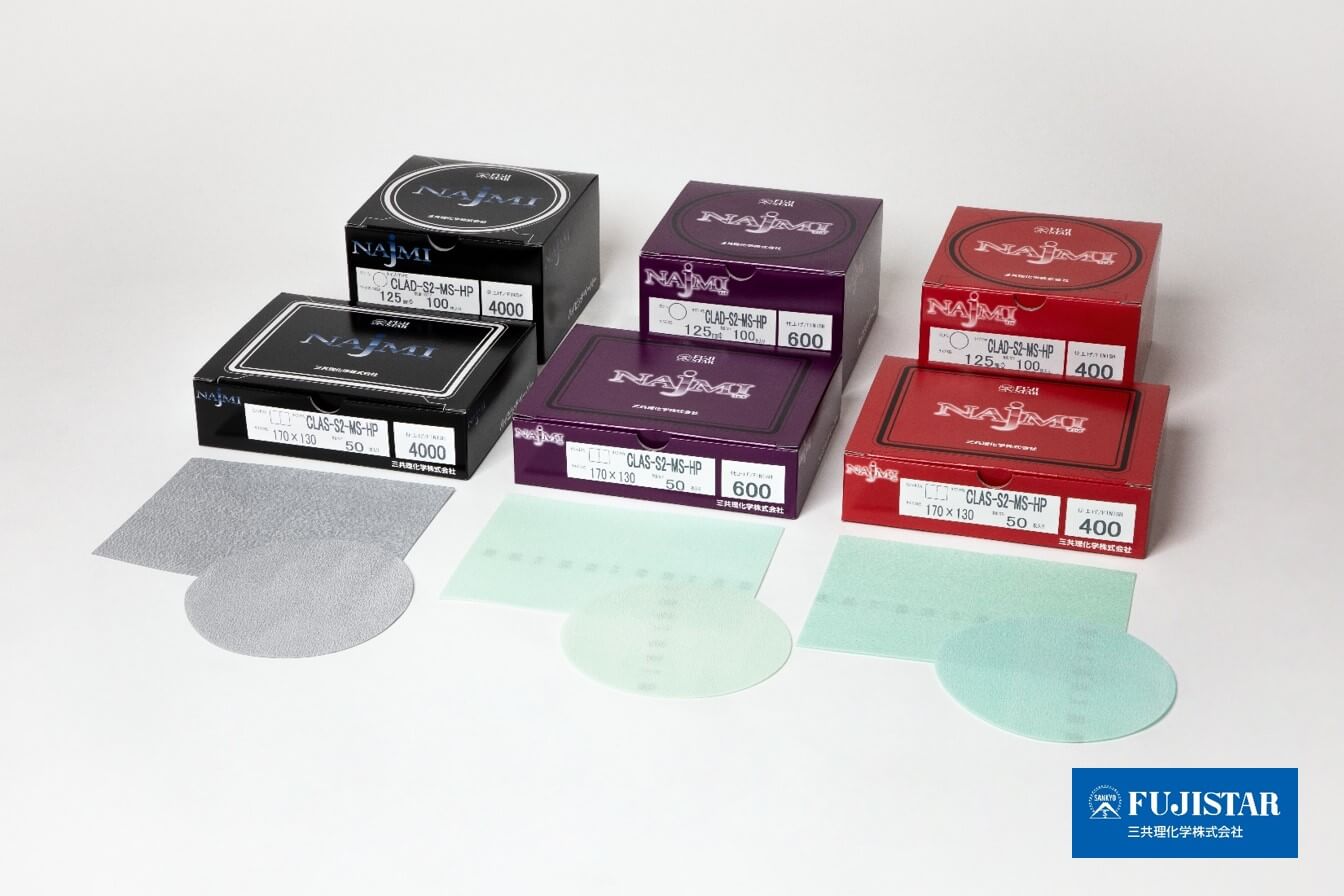
A pop-up type high-grade cotton rag that can be removed one sheet at a time.
Seamless and washable. Ideal for oil wiping and stain removal in auto repair shops, sheet metal painting operations, and general factories.
Click here for product details
4. It is important to take care of your silverware after cleaning! You've gone to the trouble of polishing and removing tarnish from your silver, so let's maintain that shine!
Although we were able to successfully remove the photo frame black stains described in the previous chapter, if you are feeling down about having to go to the trouble of polishing every time you see a black stain, don't worry.
It is possible to prevent darkening of silverware to some extent by taking good care of it after use.
Always wipe up after use.
Silver jewelry in particular, however, has a lot of sebum on the surface after use.
After removing it, do not forget to wipe it dry with a soft cloth (such as an eyeglass cleaner or other scratch-resistant material).
If you have sweated a lot, as in the summer, it is better to rinse the area lightly under running water and remove the water with a soft dry cloth.
Store in zipped storage bags for long-term storage.
If not used for an extended period of time, the darkening can be reduced by storing the product in a zipped bag to reduce contact with air.
When storing the product, wrap it in a soft cloth before storing it in a bag to prevent scratches at the same time.
Avoid storing near clothing
Chloride causes darkening when silverware adheres to clothing washed with bleach.
When storing, be careful not to touch the garments.
5. Enjoy the luster of silver by reviewing the care and management of silver!
In this issue, we introduced how to remove black stains from silverware.
When we hear the word "abrasive," we tend to think of sandpaper, but in fact there are also liquid abrasives such as compounds.
Liquid polishes are generally used for polishing and are best suited for finish polishing.
However, due to the nature of abrasive products, the method introduced here only removes the surface, and it is inevitable that minute scratches will be left on the object.
We recommend that you try it once on a less noticeable area before polishing.
Learn about the mechanism of blackening and how to care for it, and polish silver accessories and silverware around you to make them shine.
If you are interested in polishing, please feel free to contact Sankyo Rikagaku.
三共理化学株式会社さん(@fujistar_jp)にフォローされた…?🤔
— おもち上等兵 (@Omochi11) January 27, 2022
耐水ペーパーを補充したのがバレてた…!? pic.twitter.com/e5wGuM6hXI
Abrasive materials range from sandpaper to rolls and belts.
You may have also noticed that the backs of many more abrasives have a unique print.
In fact, this printout is packed with information that is very useful for understanding abrasives, so it is worth knowing.
In this issue, Sankyo Rikagaku Co., Ltd. a comprehensive abrasives manufacturer, introduces the structure, manufacturing methods and types of abrasives.
Table of Contents
1. How to choose abrasives - What are abrasives made of? Is it true that abrasives are versatile products that can sharpen a wide range of materials from metal to wood?
2. How to choose abrasives - Are there many types of abrasives? Read and understand the print of abrasives!
3. How to choose abrasives - Which abrasive should I choose? Let's take a look at the different shapes of abrasives!
4. How to Choose Abrasives - Which Abrasive is Best for Polishing Plastics? Polish efficiently with the right abrasives for the right situation!
5. Let's understand abrasives correctly to achieve a better finish!
1. How to choose abrasives - What are abrasives made of? Is it true that abrasives are versatile products that can sharpen a wide range of materials from metal to wood?
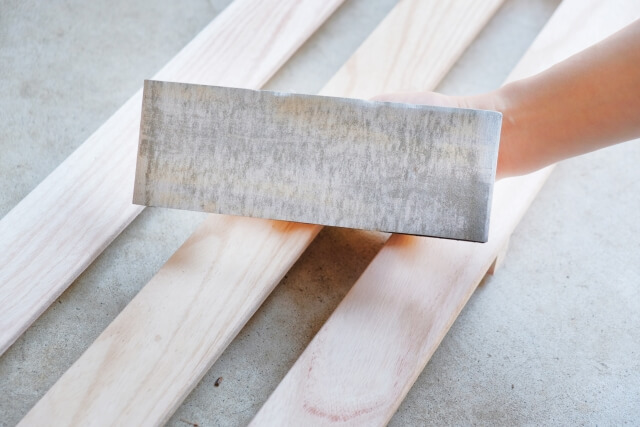
Many machining operations always involve a
Typical materials used in the polishing process are abrasives.
Since there are many different types of abrasives, it is no exaggeration to say that selecting the right one for the application will determine the finished product.
It is important to understand how abrasive materials are made in order to know what they are.
General abrasives have the structure shown in the figure below.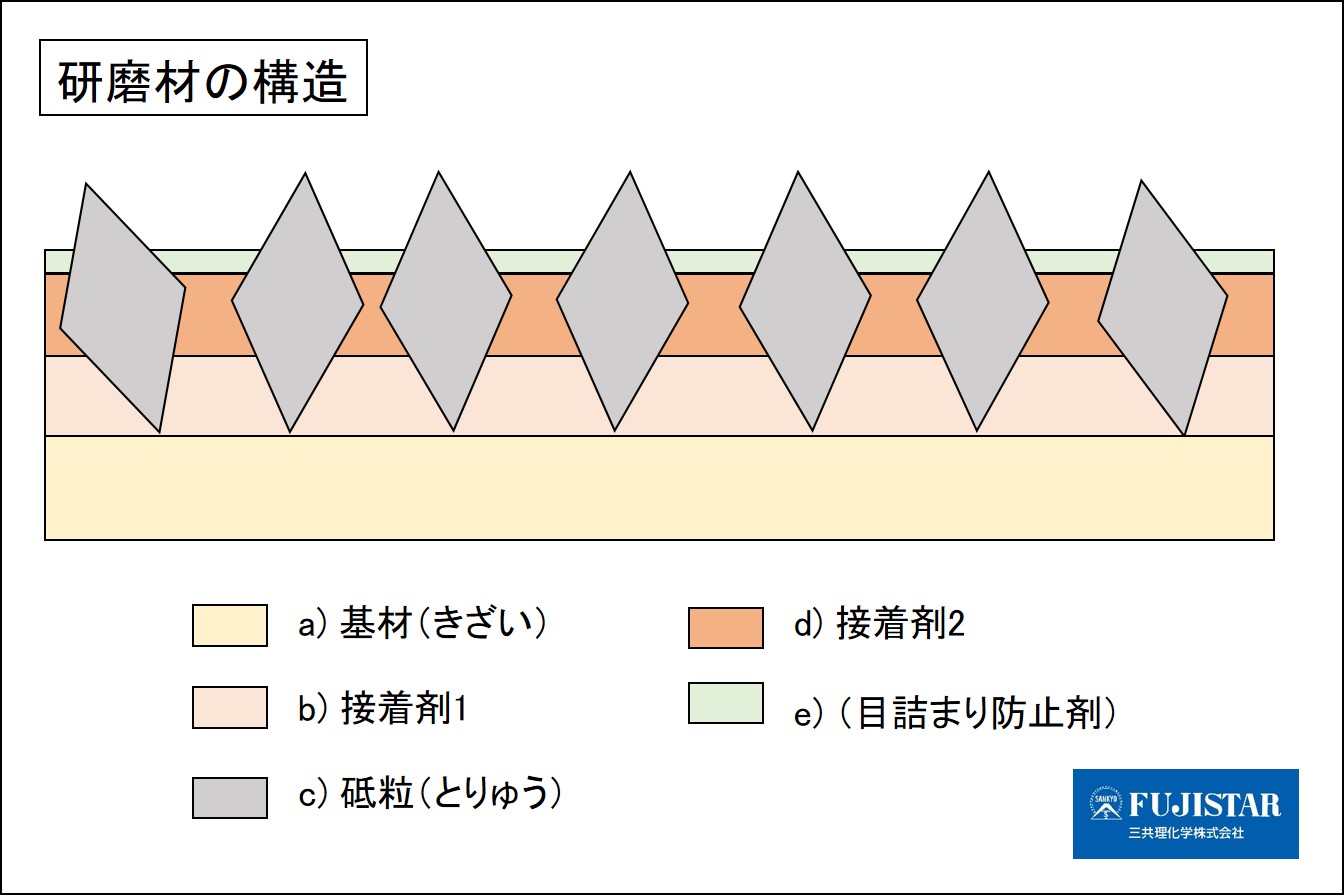
a. Base Material
Mostly paper, cloth and film, these are the main parts of abrasive materials.
b. adhesive1
Adhesive is used to fix the abrasive grains to the substrate.
c. Abrasive grains
Abrasive grains are the main component of abrasive materials. Abrasiveness varies greatly depending on the grain size and type of abrasive.
d. Adhesive2
To hold the abrasive grains firmly in place so that they do not fall out during polishing, they are hardened again with adhesive.
The type of this adhesive also greatly affects the performance of the polishing process.
e.(Anti-clogging agent)
Abrasives used in dry grinding may have an anti-clogging agent applied to the top surface layer to prevent clogging (a phenomenon in which shavings interfere with grinding).
This multi-layered coating is the reason why even just one piece of paper or cloth abrasive can scrape hard metal or wood.
2. How to choose abrasives - Are there many types of abrasives? Let's decipher the print of abrasives!
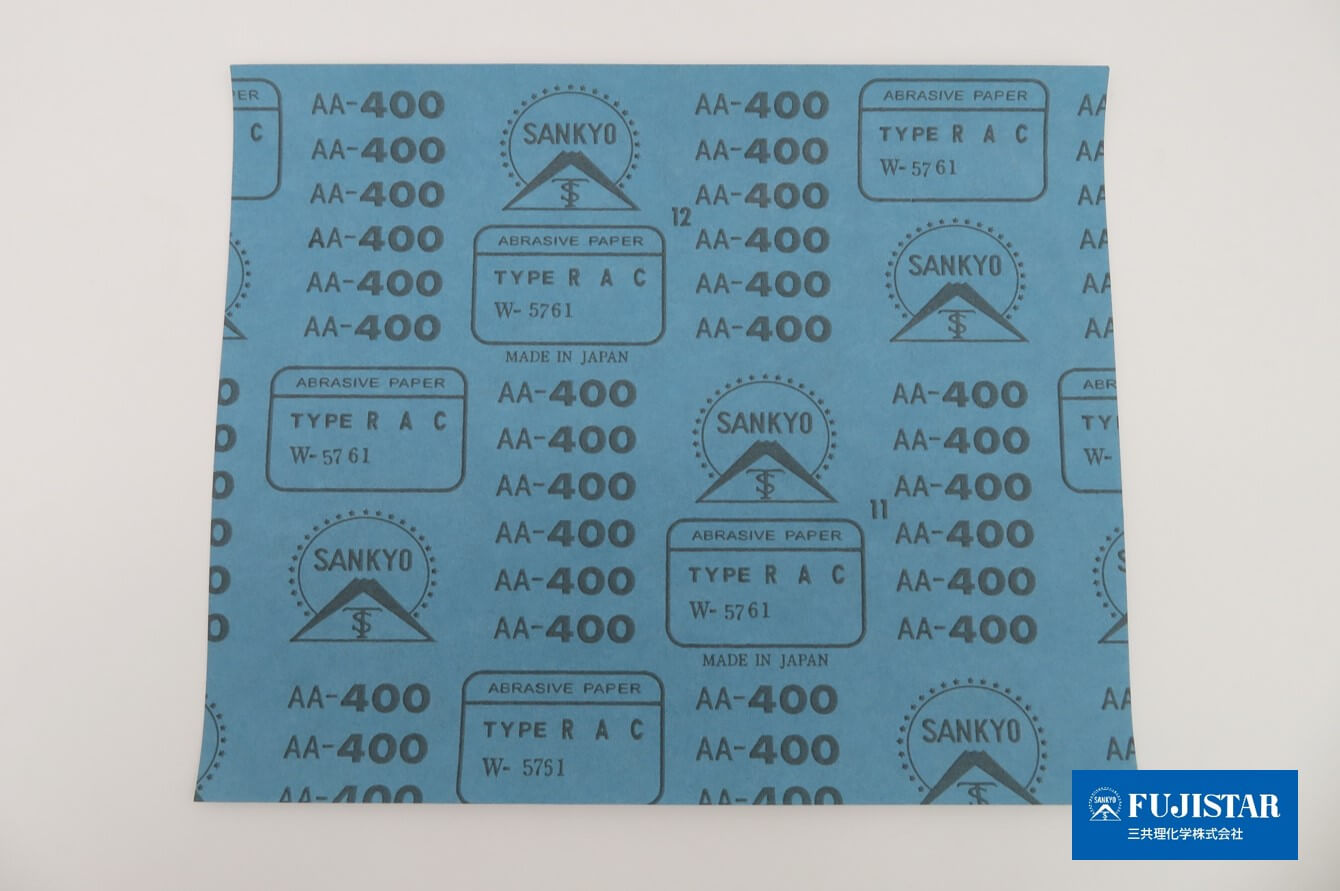
If you look closely at paper or cloth abrasives, you will often find that they are printed on the reverse side.
Do you know what these printings represent?
In fact, by deciphering the information in the print, it is possible to identify the type of abrasive.
At first glance, it may seem difficult because of the many symbols, but there are certain patterns, and once the meaning is known, deciphering is surprisingly easy.
I numbered the important parts of the abrasive print pattern.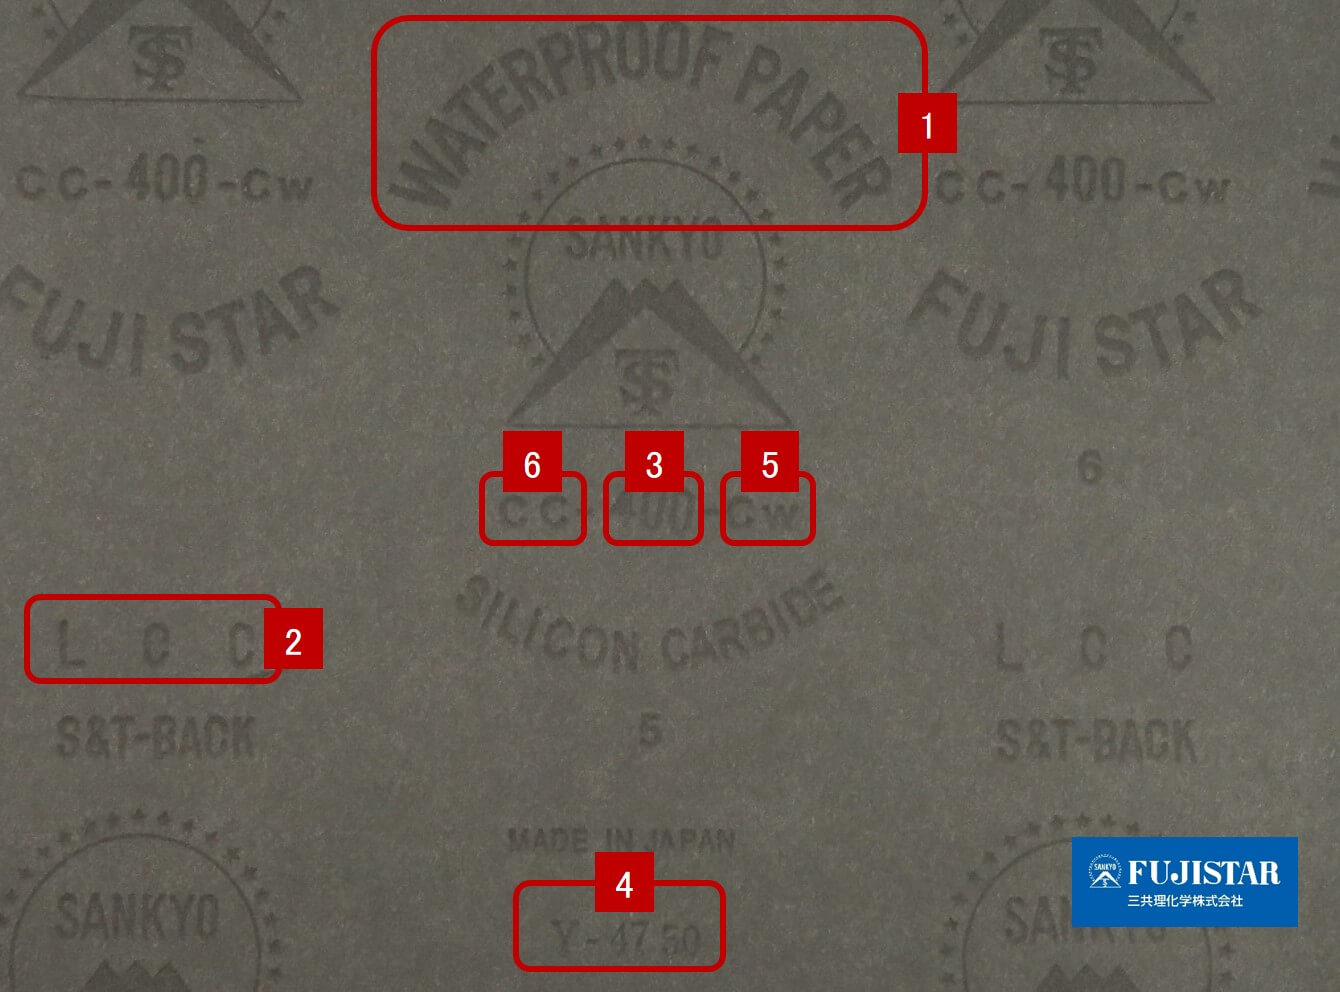

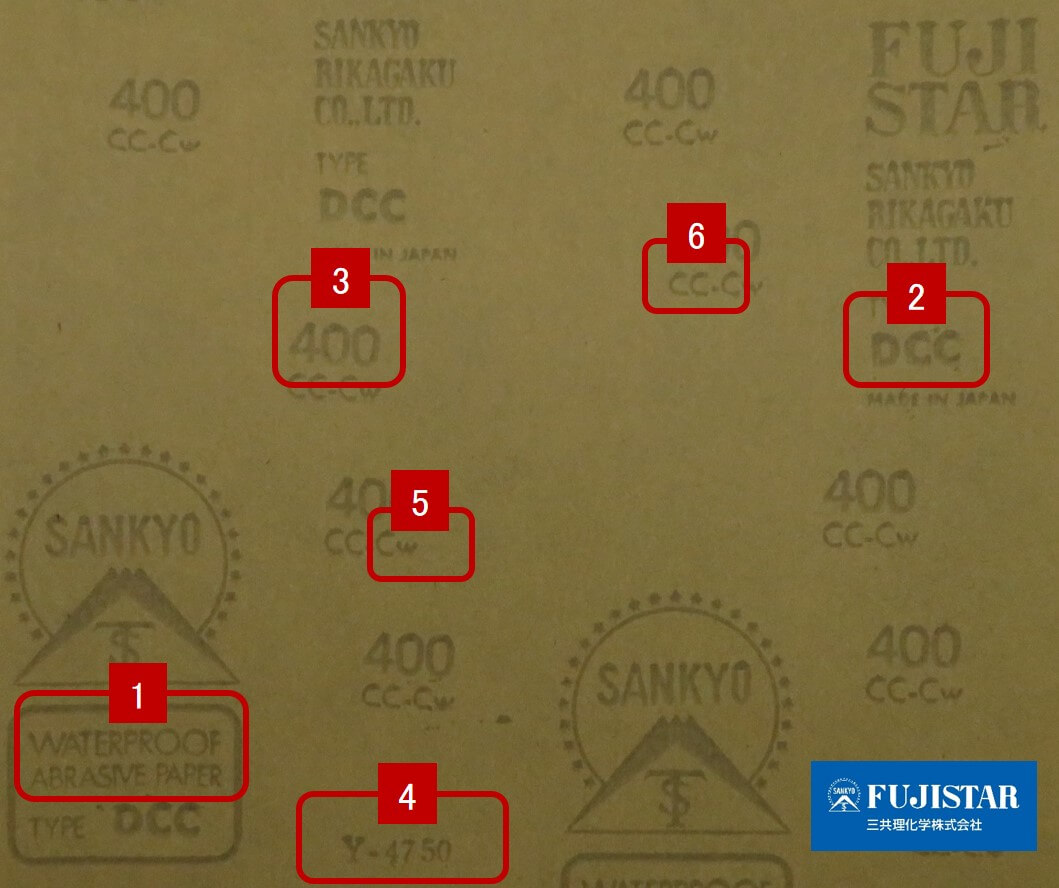
(1)Abrasive Classification
(2)Abrasive Part Number
(3)Abrasive grain size
(4)Production lot
(5)Type of base material used
(6)Type of abrasive grains used
(1)Abrasive classification
Indicates what kind of abrasive is used.
I translated it because it is often written in English.
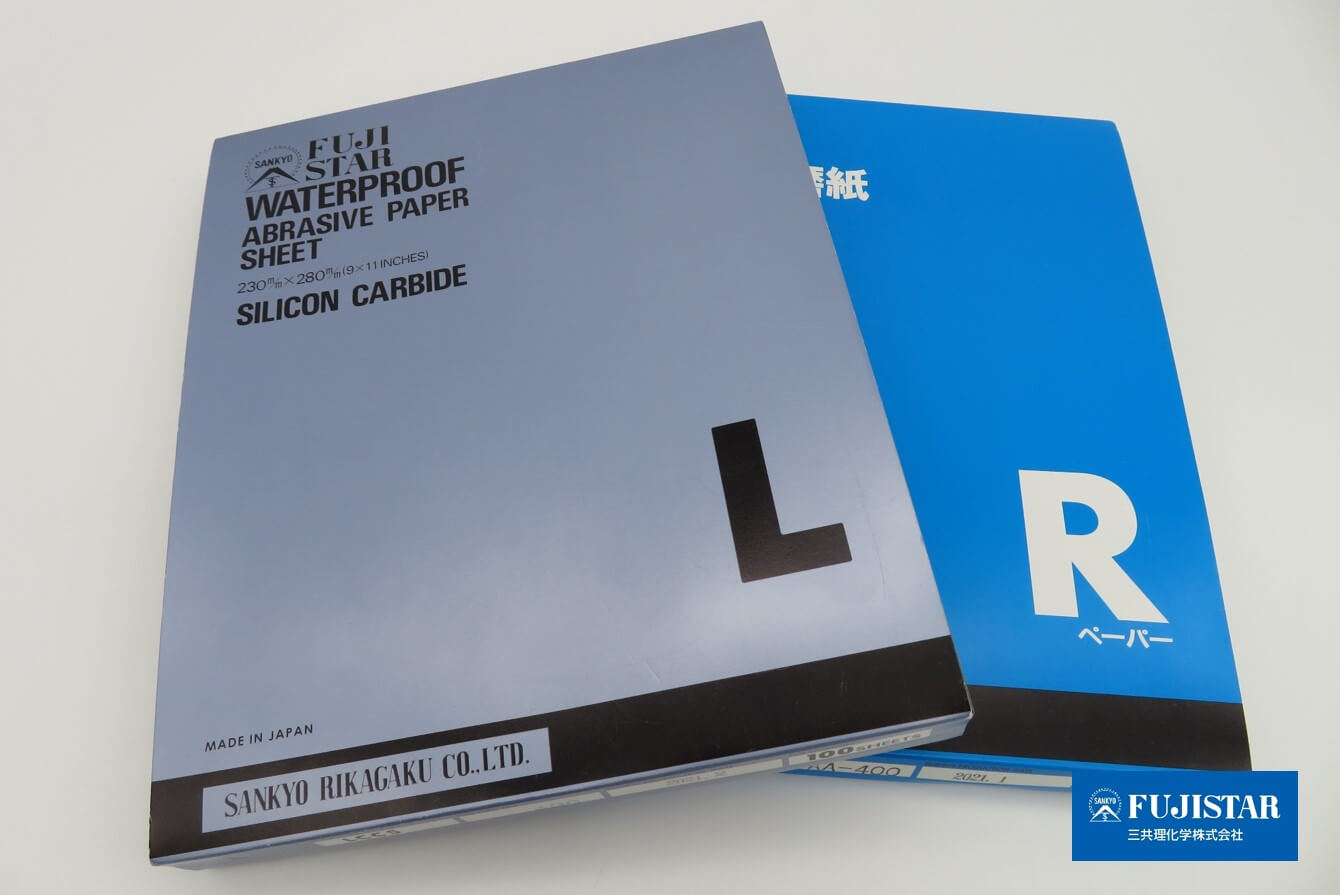
WATERPROOF PAPER:Water Resistant Abrasive Paper
ABRASIVE PAPER:abrasives
The water-resistant abrasive paper is clearly labeled
(2)Abrasive Material Part Number
This symbol indicates the type of abrasive.
Be sure to check this information as it is necessary to identify abrasive materials.
(e.g.) Most are three letters of the alphabet, such as LCC (RAC, DCC), but there are exceptions.
(3)Abrasive material grain size
This number represents the particle size of the abrasive. The size of the number determines the roughness of the finish, so be sure to check it.
The larger the number, the finer the finish.
(e.g.) #(P) + number, as in #400.
(4) Production lot
This symbol indicates when the abrasive was manufactured. Sankyo Rikagaku Co., Ltd. has developed a system to identify when and under what conditions the product was manufactured in the unlikely event of a problem with the product.
A unique serial number is assigned.
(e.g.) Y-4750, which is a combination of one letter of the alphabet and two to four numbers.
(5) Type of base material used
This symbol indicates what kind of base material (kizai) is used for the abrasives introduced earlier.
(Example 1) If the substrate is paper: (thinner) Aw-Cw-Ew-Fw (thicker)
(Example 2) If the base material is cloth: (thinner) Jw-Xw-Yw (thicker)
(6) Types of abrasive grains used
This symbol indicates what kind of abrasive grains are used in the abrasive materials introduced earlier.
(e.g.) AA (CC/GC), where the type of abrasive grain is described.
AA: brown alumina, CC: black silicon carbide, GC: green silicon carbide
Printing, which at first glance appeared to be a meaningless symbol, somehow feels right once the meaning is understood.
If you want the same abrasive as you have now, you can communicate smoothly by telling us (2), (3), and (4) when you contact us.
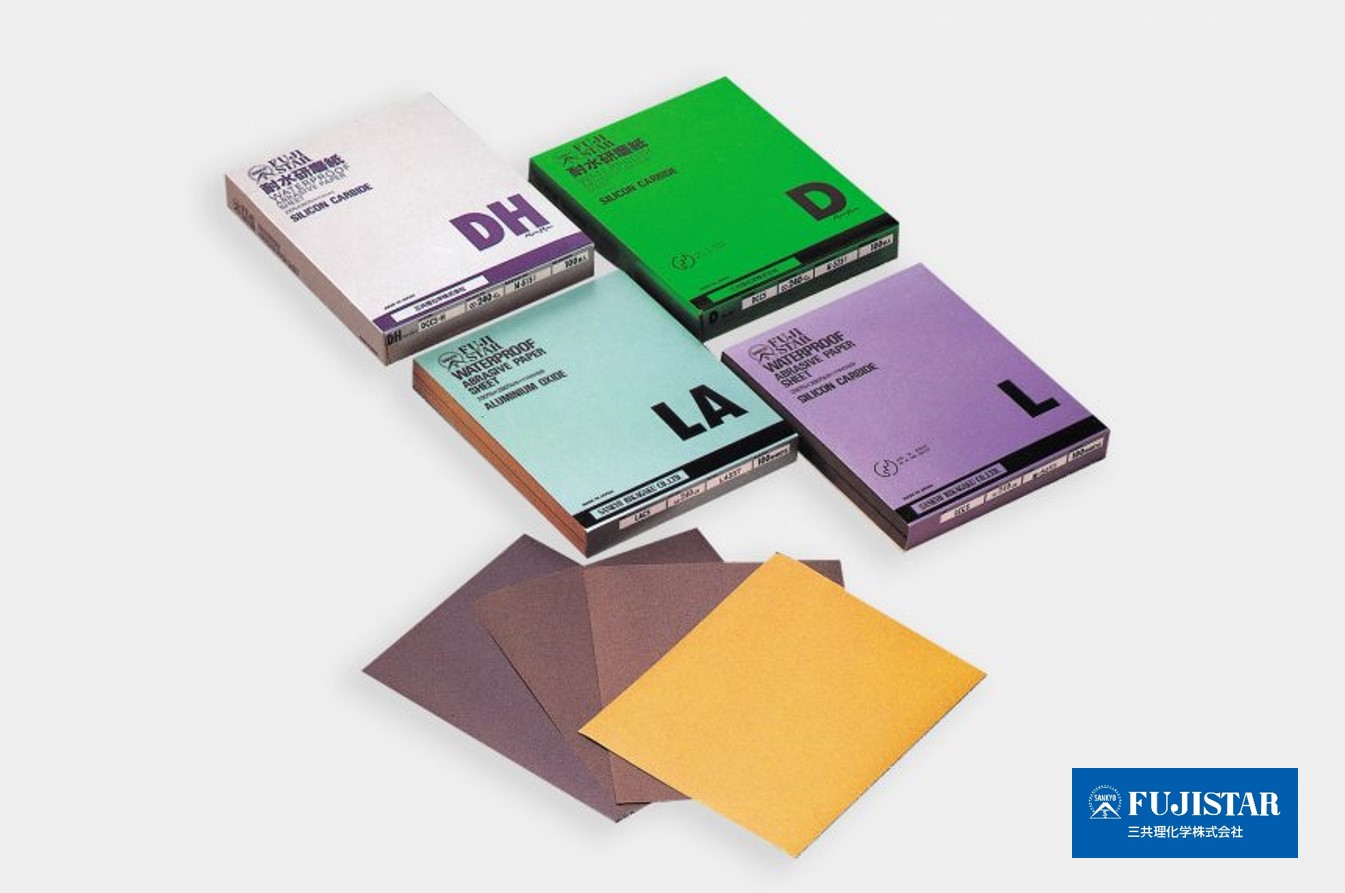
3. How to choose abrasives - Which abrasive should I choose? Let's take a look at the various shapes of abrasives!
Sheet Products - Sankyo Rikagaku Products (fujistar.com)
The sandpaper that most people think of is probably in this shape.
It is one of the abrasive materials sold at home centers and relatively easy to obtain.
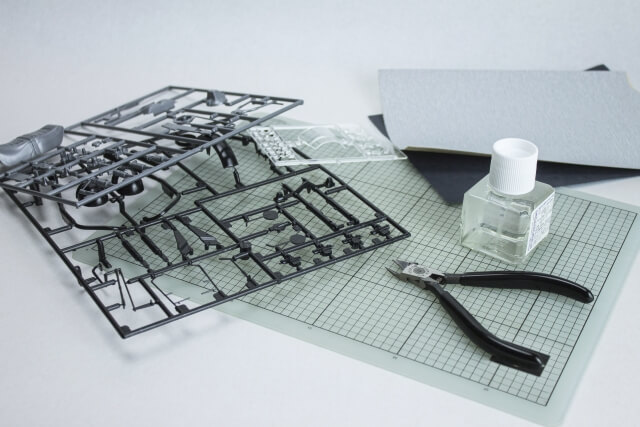
Many of you are probably using it for DIY and plastic model making.
The most important feature is its wide variety, which includes many types, from water-resistant to fabric ones.
It is also good to be able to cut and use only what you use.
Rectangular (230 mm x 280 mm) is the most common size, but recently products in various shapes to suit different applications are also available.
Disk Products - Sankyo Rikagaku Products (fujistar.com)
It will be an abrasive material to be attached to a power tool sander or a file for hand sharpening.
The back side is processed with Velcro tape and glue for easy attachment and removal.
Roll Products - Sankyo Rikagaku Products Introduction (fujistar.com)
This type is attached to a grinder and used while being unloaded by the machine. Can also be cut to fit the tool to be used, and attached to electric tools or files for hand sharpening.
In this case, the backside must have Velcro or glue treatment.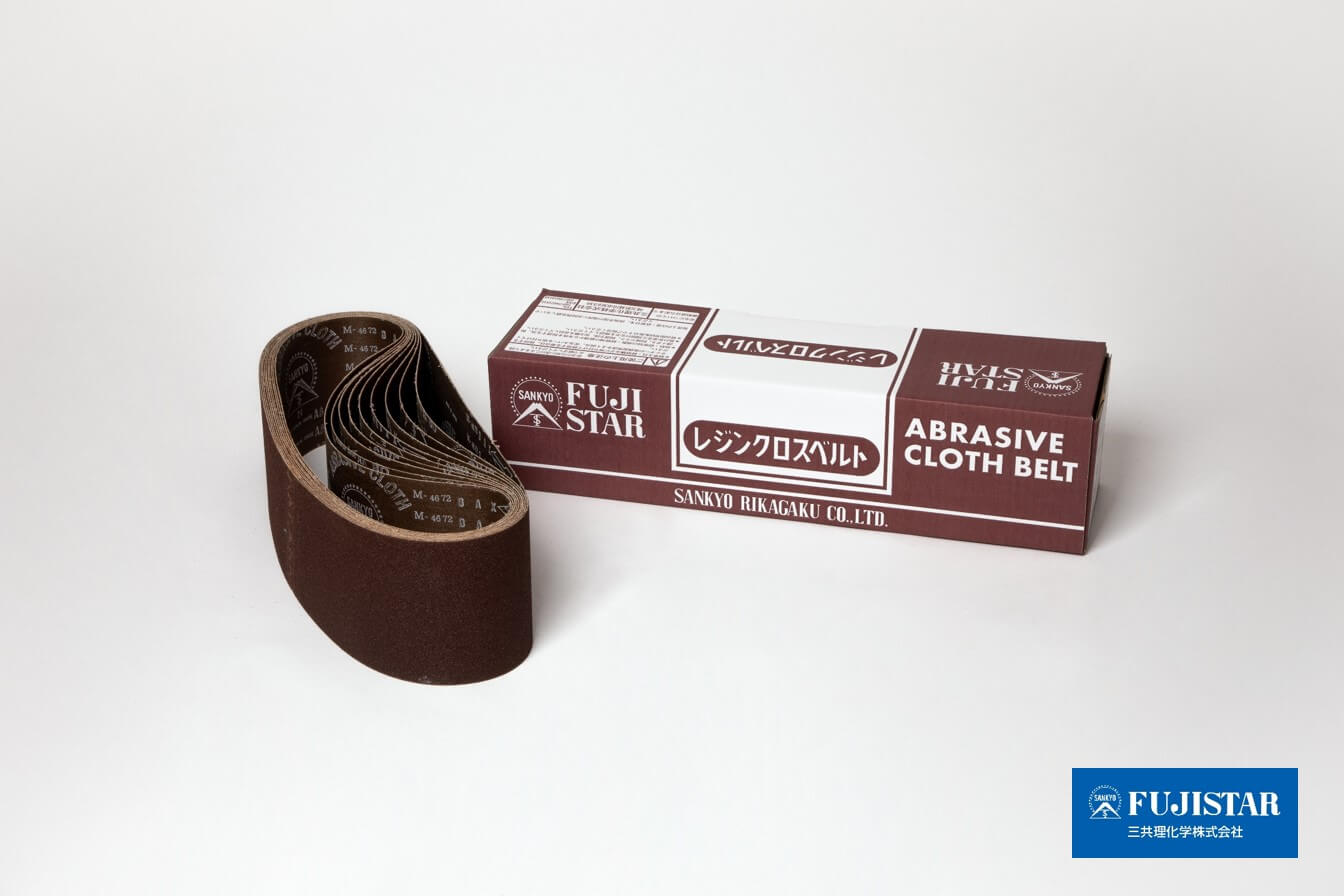
Belt Products - Sankyo Rikagaku Products (fujistar.com)
Abrasive material processed in the shape of a ring and available in various variations in width and circumference.
Polishing can be performed by attaching it to a grinder and applying a rotary motion.
We found that abrasives come in a variety of shapes and sizes.
Some types of abrasives require special tools or polishing machines, and the easiest to use is still sheet-type abrasives with hand sharpening.
Note, however, that hand sharpening may not be suitable for some uses.
4. How to choose abrasives - Which abrasives are best for polishing plastics? Polish efficiently with the right abrasive for the situation!
It is important to use different abrasive grit sizes depending on the nature of the work.
In work such as stripping paint and removing rust, the finish will be somewhat rough,
Coarse abrasives (with smaller grit size numbers) may be used for workability.
In contrast, fine abrasives (with larger grit size numbers) should be used for finish polishing.
The basic polishing method is to use a small grain size number for rough polishing, and then gradually change to a larger grain size number for finishing.
・When you want to polish a small area
Cut the abrasive to the appropriate size for the workpiece and polish it by hand, checking the polished surface.
We recommend abrasives in the form of sheets that are easy to cut.
・When you want to polish a large area
Since hand sharpening can be time consuming, consider using a power tool such as a sander or a grinder.
In this case, select an abrasive with a magic or glue finish for smooth installation on the tool.
・When you want to polish metal
Abrasive cloths that are resistant to abrasion and durable are recommended.
Cloth abrasives use strong cotton cloth as the base material, which is tear-resistant and highly durable.
・When you want to polish wood
As abrasives are used, they become clogged (abrasive debris accumulates between the abrasives) and their polishing ability decreases.
If you want to sharpen materials that are prone to clogging, such as wood, use a blank sharpening paper with an anti-clogging finish.
The anti-clogging agent prevents clogging and maintains abrasiveness.
・To polish resin (plastic, etc.)
Water-resistant abrasive paper, dry abrasive paper, and abrasive film are recommended.
Depending on the level of finish you are aiming for, if you are aiming for a finer finish, try using a polishing film with a finer grain size after water-resistant polishing paper.
5. Let's understand abrasives properly to achieve a better finish!
In this issue, we introduced the types of abrasives and how to select them.
It is important to select the right abrasive (type, grit size, and shape) for the material to be polished.
Choosing an incompatible abrasive may result in longer working hours and a reduced finish.
Abrasive materials have their own characteristics and areas of expertise, and understanding them will lead to improved quality and work efficiency.
If you are interested in polishing, please feel free to contact Sankyo Rikagaku.